

7 Steps to Scale Haunted House Props Without Losing the Scare
Last Updated: November 2, 2026
Quick Summary
To scale haunted house props, sketch the design and divide the real height by the sketch height to get a scale factor, then multiply every measurement by that number. Nail down total height, footprint, and clearance before cutting, and size frames, bases, and pneumatics to the full load rather than the model.
- A 12-inch sketch scaled to 96 inches gives a scale factor of 8.
- Subtract 6 inches from ceiling height for headroom when sizing a prop.
- At 1/12 scale, multiply area by the scale factor squared and weight by the cube.
- Anchor the base wider than the prop is tall and keep a 3-foot clear walkway.
- A 1.5-inch bore cylinder at 100 psi produces roughly 177 pounds of force.
Table of Contents
- Step 1: Sketch the Design and Set the Scale Factor
- Step 2: Nail Down Haunted House Prop Dimensions
- Step 3: Translate a Miniature Haunted House Diorama to Full Size
- Step 4: Choose Materials and Frame Supports That Scale
- Step 5: Plan Haunted House Sightlines and Prop Placement
- Step 6: Add Life-Size Halloween Props and Scale Pneumatics
- Step 7: Price, Transport, and Store Oversized Builds
- Pick Your Next Prop from Dr. Hyde's Laboratory
- Frequently Asked Questions
Step 1: Sketch the Design and Set the Scale Factor
Scaling haunted house props starts on paper, not in the workshop.
That single number drives everything after it. Multiply every measurement on the sketch by 8 and you have your cut list.
Proportions read as scary long before detail does.
If you would rather skip the build entirely, you can scale your scene around a finished piece from our horror props collection instead.
Step 2: Nail Down Haunted House Prop Dimensions
Haunted house prop dimensions come down to three numbers: total height, footprint, and clearance. Write all three on your plan before you cut anything.
- Total height: measure floor to ceiling at the install spot, then subtract 6 inches for headroom
- Footprint: the floor space the base needs, including any outriggers
- Clearance: how close a guest can walk without touching the prop
Most commercial haunts run ceilings between 8 and 12 feet, so a 7 to 8 foot figure leaves room for a base and a light above it. Measure the actual doorway and hallway too. A prop that cannot fit through the door never reaches the room.
Step 3: Translate a Miniature Haunted House Diorama to Full Size
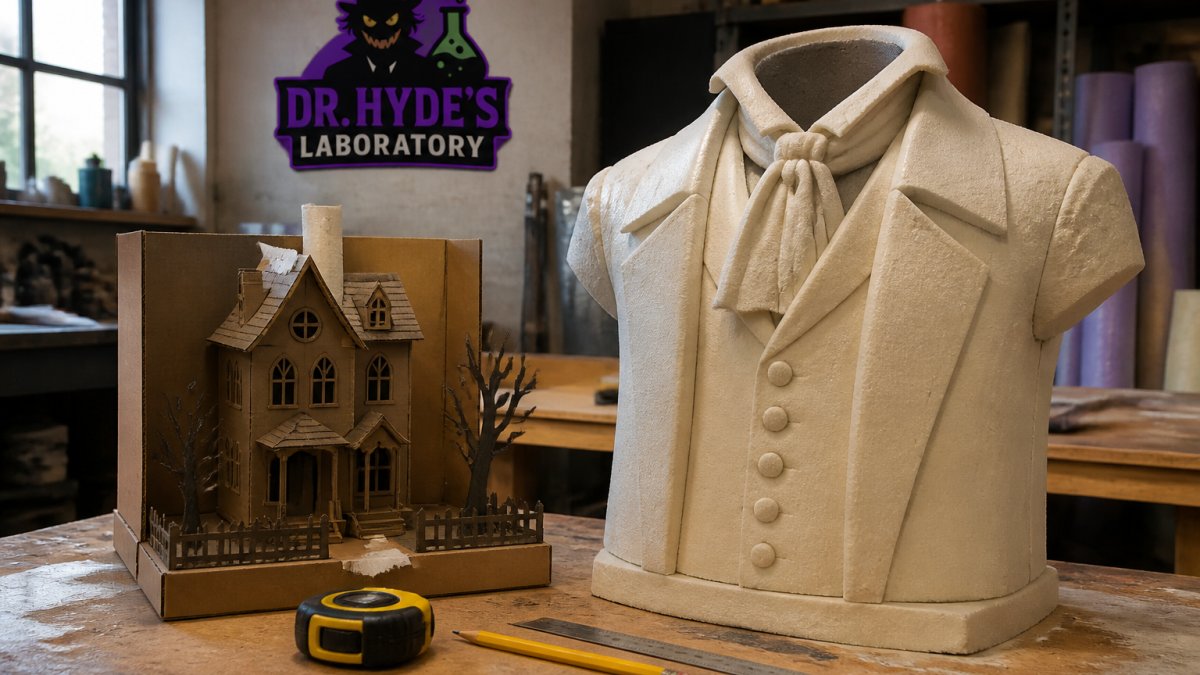
A miniature haunted house diorama is your cheapest testing ground, but only if you convert it with a repeatable method instead of eyeballing the upscale. Build the whole scene at 1/12 scale on a tabletop, then multiply every dimension by 12.
The three-number conversion method
Write these three multipliers on your plan before you touch full-size material:
- Linear dimensions (height, width, depth): multiply by the scale factor. At 1/12, a 6-inch diorama wall becomes 72 inches.
- Area (skin, fabric, paint coverage): multiply by the scale factor squared. At 1/12, a 4-square-inch panel becomes 576 square inches, roughly 4 square feet, not 48.
- Volume and weight: multiply by the scale factor cubed. At 1/12, a 1-pound diorama piece becomes about 1,728 pounds if built from the same material.
That last number is the trap. Nobody builds a full-size prop from the same material as the model, which is why you change materials as you go up. The cube rule is still useful: it tells you how much lighter your full-size material must be to stay manageable. If your 1-pound model piece would weigh 1,728 pounds in the same stock, switching to a foam-and-frame build that weighs 40 pounds is a 97 percent reduction, and that is the design target.
Convert patterns, not just numbers
A diorama pattern scales cleanly if you enlarge it by the same factor on a copier or projector. Project the 1/12 face profile onto a wall at 12x, trace it onto foam, and you have a full-size template with the model's proportions intact. Do the same for robe panels and carved details. Keep a paper master of every pattern so you can re-cut replacements mid-season without re-deriving the shape.
Check proportions and sightlines at model scale
Use the diorama to test what the full-size build cannot easily change later: head-to-body ratio, arm length, stance width, and where a guest's eye lands on the figure. A tall figure with a slightly oversized head and long arms reads as wrong in a good way; one with a small head reads as a mannequin. Fix that at 1/12 scale where a mistake costs pennies.
The three-number conversion method keeps diorama math honest when you upscale.
| What you measure | Multiplier at 1/12 | Example from the article |
|---|---|---|
| Linear dimensions (height, width, depth) | Multiply by the scale factor | 6-inch wall becomes 72 inches |
| Area (skin, fabric, paint coverage) | Multiply by the scale factor squared | 4 square inches becomes 576 square inches |
| Volume and weight | Multiply by the scale factor cubed | 1-pound piece becomes about 1,728 pounds |
Step 4: Choose Materials and Frame Supports That Scale
Materials for haunted house props that work at 18 inches fail at 8 feet. Foam board sags, cardboard buckles under paint, and thin PVC pipe bows under its own length.
- Frame: 1x2 and 2x4 lumber, or steel EMT conduit for anything over 8 feet
- Skin: expanded polystyrene foam for carved shapes, coated in hardcoat to resist dents
- Fabric: heavier cloth for robes, since light fabric reads flat on a big figure
Load matters. A tall prop is a lever, and wind or a bump at the top multiplies force at the base.
Watch out: skipping a wide base is the most common reason tall props fall over mid-season. A guest brushing a 9-foot figure can topple it if the footprint is narrow.
Step 5: Plan Haunted House Sightlines and Prop Placement
Haunted house sightlines and prop placement decide whether guests see the scare at the right moment. A great prop in the wrong spot gets walked past.
Map the guest path first. Mark where they enter, turn, and slow down.
- Tall props belong against walls or in corners, never mid-path
- Keep a 3-foot clear walkway at minimum
- Place the focal point where guests look after a turn
Lighting sells scale. A single uplight on a tall figure stretches shadows up the wall and makes the prop read larger than it is.
Step 6: Add Life-Size Halloween Props and Scale Pneumatics
Life-size Halloween props move differently than small ones. A cylinder that snaps a 2-foot prop through its motion will slam an 8-foot figure into a wall. The fix is not a bigger cylinder alone, it is sizing the whole air system to the load and the cycle rate.
Size the cylinder to the load, not the prop
A pneumatic cylinder's force equals air pressure times piston area. A 1.5-inch bore cylinder at 100 psi produces roughly 177 pounds of force; a 2.5-inch bore at the same pressure produces about 491 pounds. When you double a prop's height, the torque at the pivot can roughly quadruple because the load sits farther from the axis. That is why a cylinder that works at 2 feet can be dangerously weak at 8 feet, or dangerously strong if you oversize it and skip flow controls.
- Bore: choose the smallest bore that moves the load with margin, then add flow controls to tame the speed.
- Stroke: match the stroke to the motion arc, not the prop height. A 12-inch stroke on a long lever can swing a figure through a much larger arc than expected.
- Mounting: anchor the cylinder to the frame, not the skin. The skin flexes; the frame does not.
Calculate air demand before you buy a compressor
Compressors are rated in CFM (cubic feet per minute) at a given pressure, and tanks are rated in gallons. A common pattern is to add up the air each prop consumes per cycle, multiply by cycles per minute, and compare that total to the compressor's CFM at your operating pressure. A single large animatronic can draw more air in one cycle than several small props combined, so size for the total draw, not one cylinder.
- Use a compressor rated above your combined air demand, with headroom for leaks and simultaneous triggers.
- Run larger tubing on long runs to avoid pressure drop; a long narrow line starves the far cylinder.
- Add a manifold to split one compressor across several props, with a shutoff per branch so you can isolate a failure.
Troubleshoot at scale
Animated props fail in predictable ways once you add size and count:
- Slow or weak motion: check for leaks at fittings and manifolds first, then confirm the compressor's CFM at operating pressure, not its peak rating.
- Erratic timing: synchronize triggers with a sequencer or PLC rather than daisy-chaining valves, so one prop's cycle does not steal air from the next.
- Slam at end of stroke: add flow controls and, where the load is heavy, a cushion at the cylinder end.
- Moisture in the lines: use a filter-regulator-lubricator at the compressor and drain tanks regularly; water in a long run reaches the far prop first.
For a ready-made example of what full scale looks like, our 8FT Animated The Time Demon is a 93-1/2-inch animated prop with light-up eyes and a light-up hourglass.

Step 7: Price, Transport, and Store Oversized Builds
Oversized builds cost more than the sum of their parts. Budget for lumber, foam, coating, paint, hardware, pneumatics, and the hours to assemble it all. Then add transport and storage, which is where most budgets blow up.
- Transport: measure your trailer or truck bed before you build, not after
- Assembly: design joints so the prop breaks into sections that fit a doorway
- Storage: dry, off the floor, and covered to protect foam from moisture and pests
- Durability: seal outdoor pieces and inspect joints each season
Pick Your Next Prop from Dr. Hyde's Laboratory
Scaling a prop well takes a scale factor, honest dimensions, the right frame, and a plan for moving it. Get those right and the scare holds up at any size.
Our pieces blur the line between design and narrative, so a figure does more than stand there. Add a scaled centerpiece with the Giant Skull Animatronic Lamp Prop. Fast shipping keeps your build on schedule when opening night is close.
Frequently Asked Questions
How do you scale haunted house props to fit a room?
Measure the room's ceiling height, width, and clear walkway first, then set a scale factor that keeps the prop at least 2 feet from visitor paths. For a 9-foot ceiling, an 8-foot prop leaves only about 12 inches of clearance, so a 7-foot or 6-foot version often works better. Sketch the prop at full size on graph paper, check the diagonal sightline from the entrance, and confirm the finished height against your door openings before you cut any material.
What scale should haunted house props be?
Most haunted house props read best between 1:1 and 2:1 human scale. A 6-foot figure at 1:1 feels real, while an 8-foot to 10-foot figure at roughly 1.3:1 to 1.7:1 feels threatening without overwhelming a standard room. Forced perspective can push the effect further: a smaller prop placed closer to the path looks bigger than a large prop set far back. Match the scale to your ceiling height and sightlines rather than picking a number in isolation.
How far away should a prop be from visitors?
Keep static props at least 2 feet outside the walkway and animated props at least 3 feet back so moving parts cannot strike anyone. Place the tallest pieces 6 to 10 feet from the main path so visitors have to look up, which makes the height feel larger. Check the sightline from the entrance: a prop should be visible before visitors reach it, and its base should stay hidden behind a wall, fog, or low set dressing to sell the illusion.
How do you safely secure tall outdoor Halloween props?
Anchor tall props with a weighted base, ground stakes, or guy lines rated for the prop's wind load, and check the manufacturer's anchoring instructions. Set the base on level ground, keep the center of gravity low, and avoid placing tall pieces where foot traffic or pets can tip them. For an 8-foot animated piece, bring it inside or lay it down when high winds are forecast.
Ready to stop scaling and start scaring? Browse the full collection at Dr. Hyde's Laboratory and find the piece that anchors your haunt.
