

7 Tips for Creating Narrative Driven Horror Decor
Last Updated: October 25, 2026
Quick Summary
Narrative driven horror decor means choosing every light, fabric, and figure to serve a single story that unfolds as visitors walk through the space. Write a one-sentence story first, then map a room-by-room route with a hook, clue, escalation, reveal, and exit so each room answers a question the last one raised.
- Write one sentence naming a place, a wrong thing that happened, and what visitors witness.
- Map five rooms: hook, clue, escalation, reveal, and exit, in that order.
- Light one object per room and let everything else fall into shadow.
- Alternate tight and open spaces so tension rises instead of flatlining.
- Keep fabric at least 12 inches from any heat source and never cover a vent.
Table of Contents
- Start With a Premise, Not a Prop
- Haunted House Storyline Ideas That Actually Build
- Plan a Haunted House Room-by-Room Story
- Horror Set Design Ideas for Lighting, Color, and Shadow
- Choose Props That Carry the Plot Forward
- Control Pace and Visitor Flow Through Vulnerable Spaces
- Build Safe, Reusable Decor Without Losing the Scare
- Shop the Pieces That Do More Than Exist
- Frequently Asked Questions
Start With a Premise, Not a Prop
Most haunted houses fail for one reason: they buy props first and invent a story later.
A prop is a noun. A story is a verb. One sits there. The other makes a visitor move, lean in, and wonder what happens next.
Narrative driven horror decor is the practice of choosing every light, fabric, and figure to serve a single story that unfolds as visitors walk through the space.
Start with the story, and the shopping list writes itself.
Write the One-Sentence Story First
Before you buy a single skeleton, write one sentence. It should name a place, a wrong thing that happened there, and what the visitor will witness.
Here are three that work:
- "A carnival shut down after the performers vanished, and the tents still run themselves."
- "A family sealed the basement in 1923, and something has been counting the days."
- "A lab kept experimenting after the funding ran out, and the subjects learned the rules."
That sentence is your anchor. Every decor decision either supports it or gets cut. A common mistake is buying a great prop that belongs to a different story. It always reads as clutter, no matter how good it looks.
Haunted House Storyline Ideas That Actually Build
The best haunted house storyline ideas share one trait: they leave a trail. Visitors should find evidence of something that happened before they arrived, not just a monster waiting to jump out.
Strong storylines come in a few reliable shapes:
- The interrupted event. A party, wedding, or carnival stopped mid-celebration. Plates still set, chairs knocked over, music still playing.
- The failed experiment. Something escaped or changed. Charts on the wall, empty cages, a door left open.
- The return. A place was abandoned and someone, or something, came back. Fresh footprints in old dust.
Pick one shape and commit. Mixed storylines confuse visitors, and confusion kills fear.
Plan a Haunted House Room-by-Room Story
A haunted house room-by-room story is a floor plan with a plot.
Map it on paper before you decorate:
- Room 1: The hook. Establish the setting. Keep it quiet. Let visitors notice details.
- Room 2: The clue. Something is wrong here. A stain, a sound, a door that shouldn't be open.
- Room 3: The escalation. The story gets louder. Props get bigger. Lights get stranger.
- Room 4: The reveal. The payoff. This is where your best figure or effect lives.
- Room 5: The exit. A final detail that sends them out unsettled.
For a deeper build on this method, our guide on how to build an immersive haunted house walks through construction room by room.
Watch out: putting your biggest scare in room one. Visitors have no context yet, so it lands flat, and everything after feels weaker.
Each room in the route has one job, and the order matters more than the props.
| Room | Story job | What happens |
|---|---|---|
| Room 1: The hook | Establish the setting | Keep it quiet; let visitors notice details |
| Room 2: The clue | Something is wrong here | A stain, a sound, a door that shouldn't be open |
| Room 3: The escalation | The story gets louder | Props get bigger, lights get stranger |
| Room 4: The reveal | The payoff | Your best figure or effect lives here |
| Room 5: The exit | Send them out unsettled | A final detail follows them out |
Horror Set Design Ideas for Lighting, Color, and Shadow
Horror set design ideas live or die on light. Darkness hides everything, including your work. The trick is controlling what visitors can see and when.
Three lighting moves do most of the heavy lifting:
- Dim pools of light. Light one object per room. Everything else falls into shadow.
- Flicker and candlelight. Unsteady light makes still objects feel alive.
- Backlighting. Put the light behind a figure so visitors see a silhouette first.
Color carries the mood. Muted hues, browns, and grays read as age and decay.
For projection-based scares, Hollusion Projection Material turns a hanging sheet into a ghost that appears from nowhere. Our article on creating immersive haunted house atmosphere goes deeper into light and shadow.

Choose Props That Carry the Plot Forward
A prop earns its place by answering a question. A cracked mirror asks who broke it. A spirit board asks who was trying to talk.
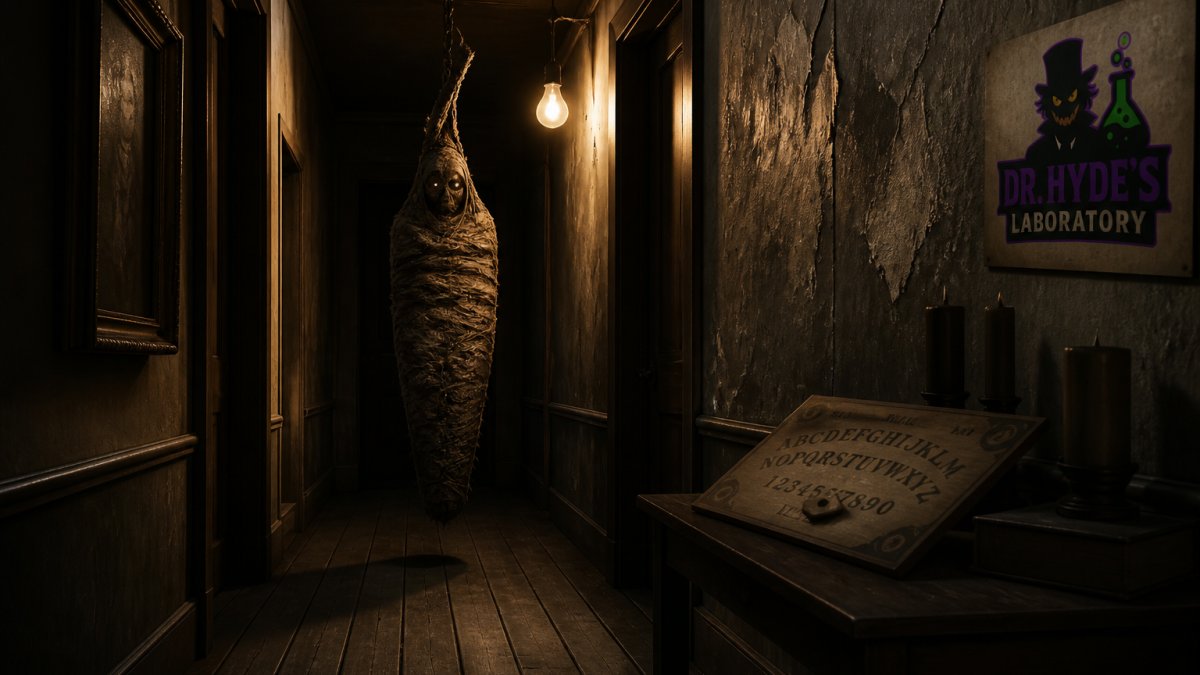
The Witch Board Halloween III is a good example of a prop that does narrative work. It glows in the dark, comes in a collector's display box, and reads as an object someone was using right before things went wrong.
Three rules keep props on-message:
- One hero prop per room. Everything else supports it.
- Props should look used, not displayed.
- Every prop needs a reason to be exactly where it sits.
Control Pace and Visitor Flow Through Vulnerable Spaces
Pacing is the most overlooked part of horror decor. A scare every ten feet exhausts visitors.
Start with a simple floor plan on graph paper. Mark the entrance, the exit, and every doorway and turn. Then draw the visitor path as a single line and annotate it with four things:
- Sightlines. What can a visitor see from each point on the path? If they can see the reveal from the entrance, the reveal is wasted. Use walls, curtains, and props to block long views and force discovery.
- Pause points. A narrow doorway, a short dead-end, or a turn where the visitor must stop for a beat. These are where clues land. Give them something to look at, a prop, a stain, a note, so the pause feels intentional rather than like a traffic jam.
- Reveal points. The exact spot where a figure, effect, or light change first becomes visible. Place reveals after a pause, not during one. The sequence is: pause, then reveal, then release into the next space.
A common pattern is to alternate tight and open spaces: squeeze them through a narrow hallway, then let them into a slightly wider room, then squeeze again.
Build in rhythm with three tools:
- Tight space, then open space. Use doorways and hallways as pressure points, then release.
- Silence before sound. Cut the audio for a few steps, then hit them. The silence makes the sound feel louder.
- Slow corners. Force a turn where they cannot see what is ahead. The not-knowing is the scare.
Throughput matters too. If your haunt moves groups of six every two minutes, a 12-minute route gives you roughly 36 visitors per hour at peak.
Finally, plan the exit. The last thing visitors see should be a final detail that sends them out unsettled, a door left ajar, a light that flickers once, a sound that follows them out. Do not end on your biggest prop. End on the smallest wrong thing.
Build Safe, Reusable Decor Without Losing the Scare
Safety and scares are not opposites. The scariest haunts are the ones where nothing actually goes wrong. Most decorating guides stop at "tape down your cords." That is the floor, not the ceiling. A narrative haunt needs a safety plan that covers the physical route, the sensory experience, and the season-to-season reality of storage and reuse.
Physical safety: the route and the rigging
Build these into your plan from day one:
- Anchor every hanging piece to a stud or a rated hook. A 10-pound prop on a drywall anchor is a falling object waiting to happen.
- Keep walkways clear and lit at floor level. Use battery-powered LED strip lights or glow markers along the path so visitors can see their feet without breaking the mood.
- Use battery-powered lights near fabric. Real candles and open flames are a non-starter in a decorated space with curtains, paper, and moving visitors.
Accessibility and sensory sensitivity
A haunt that only works for fully mobile, neurotypical visitors leaves people out and creates risk. Build in alternatives:
- Mobility access. Provide a bypass route or a clearly marked alternative path for visitors who use wheelchairs, walkers, or strollers. The bypass should still tell the story, use a window, a curtain gap, or a short side room with the key props visible.
- Sensory warnings. Post a simple intensity rating at the entrance: low, medium, high. Note whether the route includes strobe lights, sudden loud sounds, tight spaces, or strong scents. Visitors can opt in or opt out.
- Quiet zones. Designate one room or outdoor area as a low-scare zone where visitors can step out, catch their breath, and rejoin the group. This is especially important for family nights and mixed-age groups.
Reusable and budget-conscious choices
Reusable decor saves money and keeps your story consistent year to year. Fabric curtains, wooden props, and sturdy hanging figures survive seasons of use. A 3-Piece Creepy Carnival Curtain Set, for example, sets an entire entrance theme in minutes and packs away flat.
A few practical rules for reuse:
- Store fabric in labeled bins with cedar blocks or silica packets to prevent mustiness and pests.
- Photograph each room after setup so you can rebuild the same layout next year without guesswork.
- Buy neutral base pieces, black curtains, wooden crates, aged signage, and change the story with small, cheap accents rather than replacing everything.
Shop the Pieces That Do More Than Exist
Shopping for narrative decor is different from shopping for Halloween. You are casting characters, not filling shelves.
Ask three questions before buying anything:
- Does this piece fit my one-sentence story?
- Will visitors remember it tomorrow?
- Can I reuse it next season without rebuilding?
Start with the pieces that carry the most story weight. A glowing spirit board, a hanging corpse, a themed curtain set. Skip the filler.
For a full buyer's list, our 2026 guide to the best horror props for immersive events covers what to buy first.
Frequently Asked Questions
How do you create a story for a haunted house?
Write one sentence first: who was here, what happened, and what is left behind. Then break that sentence into three beats (arrival, discovery, consequence) and assign each beat to a room. Every prop and lighting change should support one of those beats. If a decoration does not move the story forward, cut it. This keeps narrative driven horror decor from turning into a pile of unrelated scares.
What makes a haunted house storyline effective?
Continuity and restraint. Guests should recognize the same character or object in more than one room, so the space feels lived in rather than staged. Pair that with gradual reveals: show a footprint in the entry, the matching boot in the hallway, and the owner in the last room. A storyline works when the visitor can reconstruct it after leaving, not just react to it in the moment.
How can props help tell a horror story?
Props work as evidence. A spirit board left mid-session, a torn curtain, or a corpse still hanging in its cocoon implies an event that happened before the guest arrived. Place props so they answer a question the previous room raised. For a haunted house room-by-room story, one plot-carrying prop per room is usually enough; extra props dilute the clue rather than strengthen it.
How do you make horror decor feel immersive?
Match every sense to the same premise. Dim lighting, flickering bulbs, and candlelight set the visual tone, but sound, temperature, and smell carry equal weight. Keep sightlines narrow so guests cannot see the whole room at once, and use shadows and contrast to hide the edges of your set. Immersion breaks the moment a guest spots a modern extension cord or a brightly lit exit sign.
Building a haunt that actually tells a story takes more than a cart full of props. It takes a premise, a plan, and pieces designed to carry both. Dr. Hyde's Laboratory builds decor that blurs the line between design and narrative, with unique non-conventional styles, experimental pieces, and fast shipping so your story opens on time. Get started with Dr. Hyde's Laboratory and turn your next haunt into something visitors cannot shake.
