

High-Impact Halloween Costume Design: A How-To Guide
Table of Contents
- The Design Framework: Creating a High-Impact Halloween Costume
- DIY Horror Costume Ideas That Command Attention
- How to Make a Halloween Costume from Everyday Items
- Horror Costume Materials That Deliver Impact
- Building Your Costume: Step-by-Step Instructions
- Budget and Skill-Level Planning
- Common Mistakes to Avoid
- Frequently Asked Questions
Last Updated: October 21, 2026
The Design Framework: Creating a High-Impact Halloween Costume
A high impact halloween costume isn't about random pieces thrown together. It's about visual strategy.
The best designs follow a repeatable process. You start with a clear visual narrative, then build outward with materials and texture. The result is a costume that doesn't just look good, it shifts how people perceive you.
Visual Impact Principles
Your costume's impact depends on how quickly someone can identify it from ten feet away. This is the core principle behind any memorable design.
The strongest costumes use bold contrast. Dark silhouettes against light backgrounds read faster than subtle gradations. Think shadow and light, not muddy middle tones.
Texture matters more than most people realize. Smooth fabric alone feels flat. Add rough elements, layered materials, or dimensional details and suddenly the costume has presence. This is why masks work so well.
Silhouette, Color, and Recognizable Details
Your silhouette is the first thing people see. Before they notice the mask, the fabric, or the accessories, they see the overall shape.
Exaggerated silhouettes command attention. Oversized shoulders, extended proportions, or unexpected height changes make you visually distinct. A costume that matches normal human proportions blends in.
Recognizable details are your shorthand. The Devil Injection Mask from Dr.

Color contrast creates visual separation. Pair dark with light. Use complementary colors.
DIY Horror Costume Ideas That Command Attention
The best DIY horror costume ideas start with a clear concept. You're not building random pieces, you're constructing a visual story that reads instantly.
Iconic Characters and Pop-Culture Moments
Iconic characters work because people already know them. Your job is to make the design unmistakable and add your own interpretation.
A creature from a horror film gives you a blueprint. Study the source material. A Ghost Injection Mask from Dr.

Original creature designs let you create something nobody else will wear. Start with an animal or concept, a twisted version of something familiar.
The strongest designs combine recognition with originality. People should instantly understand the concept, but see something they've never encountered before.
Original Creature Designs
Creating an original creature means starting with a clear visual foundation. Pick one core concept: Is it organic or mechanical? Predatory or alien?
Build the silhouette around that concept. An elongated, spindly creature needs extended limbs and a narrow torso.
Add one unexpected element. Maybe your creature has scales but also metal plating. Perhaps it's sleek but with jagged protrusions.
Texture carries original designs. Smooth fabric alone doesn't convince. Layer materials. Mix rough and refined. Use contrasting textures to define different body parts.
How to Make a Halloween Costume from Everyday Items
You don't need specialty costume supplies to build something striking. Everyday household items can become the foundation of a high-impact design.
Household Materials as Foundation
Start with what you already have. Old clothing becomes base layers. Sheets and fabric scraps become draping elements. Cardboard boxes become structural supports for exaggerated silhouettes.
The key is seeing potential. A black garbage bag isn't just trash, it's lightweight material that moves and creates shadow. A wire coat hanger becomes a frame for extending your silhouette.
Think about what each material can do. Fabric drapes and creates flow. Rigid materials hold shapes. Transparent materials add depth. Reflective materials catch light. Combine them strategically.
Craft Supplies and Recycled Elements
Craft stores offer affordable options. Foam sheets create dimensional details without weight. Hot glue attaches almost anything. Spray paint transforms materials instantly.
Recycled elements add authenticity. Old plastic bottles become armor plating. Broken jewelry becomes decoration. Scrap metal creates texture. The more unexpected the material, the more interesting the result.
Mix new and recycled. A store-bought mask paired with handmade armor creates impact.
Horror Costume Materials That Deliver Impact
Choosing the right materials determines whether your costume looks amateur or professional. Material selection isn't just about durability, it's about visual impact.
Fabric, Texture, and Wearable Constructs
Fabric choice changes everything. Matte black fabric absorbs light and creates shadow. Velvet adds depth and richness. Satin creates shine and movement. Each fabric type creates different visual effects.
Layering fabrics creates dimension. A sheer overlay on solid fabric adds complexity. Contrasting textures, rough burlap against smooth satin, create visual interest. Combine materials intentionally.
Wearable constructs need to move with you. Heavy materials fatigue quickly. Lightweight options let you stay in character longer. Test the weight before committing.
Masks and Props for Authenticity
A quality mask is worth the investment. Injection-molded masks hold their shape and create authentic visual impact.
Props reinforce your narrative. A weapon prop, a symbolic object, or an accessory that defines your character completes the story. Props don't need to be complex, a single recognizable element often carries more impact than overdoing it.
Authenticity comes from details. Real textures, accurate proportions, and intentional design choices make people believe in your character. Rushed or careless details break the illusion.
Building Your Costume: Step-by-Step Instructions
Follow this process to build a costume with real impact. This framework works whether you're starting from scratch or enhancing an existing design.
Step 1: Define Your Narrative and Silhouette
Start by answering one question: What story are you telling?
Write it down. One sentence. "I'm a twisted version of nature." "I'm a creature from another dimension." "I'm a horror movie character reimagined." Your narrative drives every decision that follows.
Sketch your silhouette. Don't worry about detail, just the overall shape. Is it human-like or completely alien? Tall or compact? Symmetrical or asymmetrical? This sketch is your roadmap.
Step 2: Select Core Materials and Halloween Costume Accessories
List the materials you need based on your silhouette and narrative. What creates the base shape? What adds texture? What provides color and contrast?
Gather materials before you start building. This prevents stopping mid-project to hunt for supplies. Include more than you think you'll need, material experiments often require adjustments.
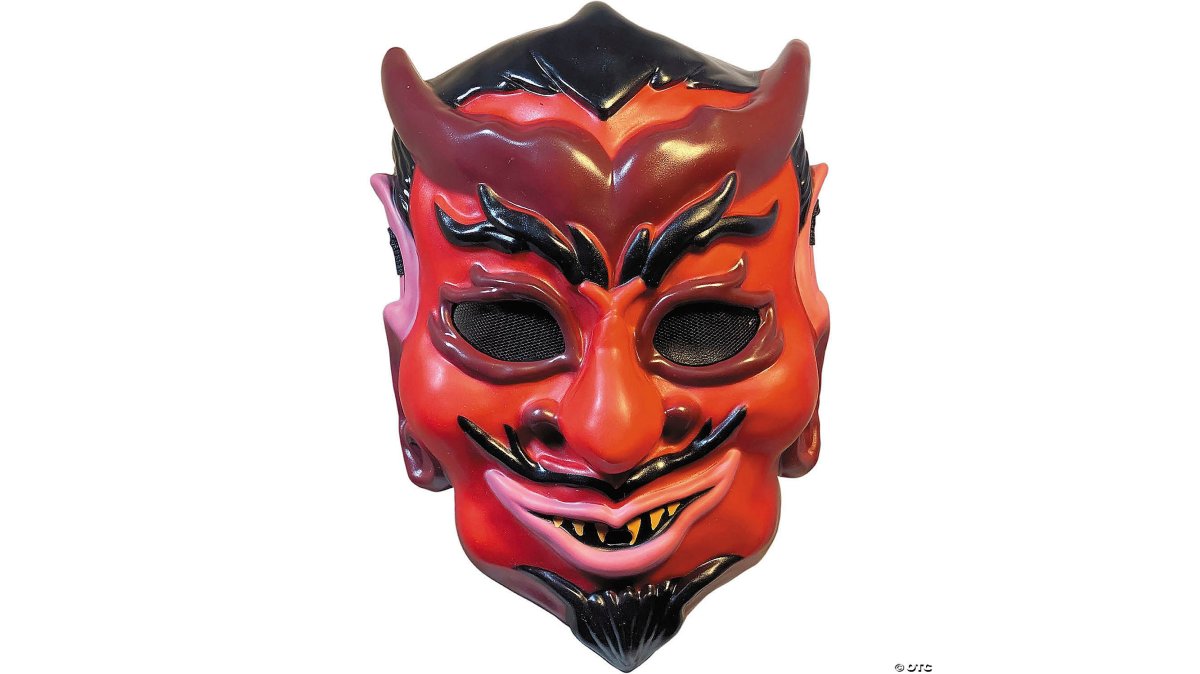
Choose one statement piece. For many high-impact costumes, this is a mask or a distinctive accessory. The Devil Injection Mask or Ghost Injection Mask from Dr. Hyde's Laboratory can serve as your anchor point.
Step 3: Construct the Base Layer
Build the foundation first. This is your structural support, the thing that holds the silhouette in place.
A fitted black shirt or bodysuit works as a base for most designs. Add padding or structure where you need exaggeration. Use foam, cardboard, or wire to create extended shapes.
Test the fit and movement. Can you move naturally? Can you sit? Can you see? Adjust before moving forward.
Step 4: Add Detail, Texture, and Contrast
Layer details onto your base. This is where your costume moves from functional to memorable.
Add textural elements, fabric scraps, painted details, dimensional pieces. Create color contrast. Use paint, fabric, or accessories to break up solid colors. Add recognizable details that define your character.
Step back frequently. View your costume from a distance. Does it read as a cohesive design? Can someone identify it instantly? Adjust details until it does.
Step 5: Test for Comfort and Wearability
Wear your complete costume for at least 30 minutes before the event. Can you move comfortably? Can you see properly? Does anything pinch, restrict, or cause discomfort?
Adjust straps, padding, and fit. Make sure nothing restricts your movement or visibility. Comfort determines whether you'll actually wear this costume or abandon it halfway through the night.
Test in the lighting conditions where you'll wear it. Does it have the impact you want? Do details read from a distance? Make final adjustments based on what you see.
Budget and Skill-Level Planning
Your budget and available time determine which approach makes sense for your situation.
Beginner-Friendly Designs on a Budget
Start with a strong mask or statement piece. The Devil Injection Mask or Ghost Injection Mask from Dr. Hyde's Laboratory costs $23.99 and does most of the visual work for you.
Build around it with basic materials. Black clothing from your closet. Fabric scraps from a craft store. Spray paint and hot glue.
Choose designs that don't require advanced sewing or construction skills. Layering, gluing, and painting work for most concepts. Avoid designs that require precise tailoring or complex assembly.
When to Invest in Professional-Grade Pieces
If you're building a signature costume you'll wear multiple times, invest in quality pieces. Professional-grade masks, armor pieces, and accessories last years. They maintain their shape and impact.
The Dreamgirl Vampire Queen costume at $48.00 or the Dreamgirl Emerald Enchantress at $67.00 provide professional construction and design. These pieces work as standalone costumes or as components in a larger build.

For event planners and haunted house operators, professional pieces justify the investment. They withstand repeated use, create consistent impact, and enhance the overall experience.
Common Mistakes to Avoid
Most costume failures come from predictable mistakes. Avoid these and you're already ahead.
Don't overcomplicate. More details don't equal better impact.
Don't neglect silhouette. Silhouette is read first. If it's not striking, details won't save you.
Don't ignore color contrast. Monochromatic designs disappear. Bold contrast creates presence. Light against dark.
Don't sacrifice comfort for impact. You won't wear an uncomfortable costume.
Don't skip the distance test. View your costume from across a room.
Creating a high-impact Halloween costume comes down to intentional design choices.
Dr. Pair these with thoughtful construction and material choices, and you've got a costume that commands attention. Halloween costume design principles from professional costume designers confirm that quality foundational pieces accelerate the entire build process.
Frequently Asked Questions
What makes a high-impact Halloween costume actually stand out?
A high-impact Halloween costume combines three elements: a distinctive silhouette that reads instantly from a distance, bold color contrast that draws the eye, and recognizable details that anchor the narrative. The silhouette should break the human outline, think exaggerated proportions, asymmetry, or unexpected extensions. Color contrast (dark against light, or complementary hues) creates visual punch. Recognizable details like a specific mask, texture, or iconic prop tell the story immediately. When these three work together, your costume commands attention without relying on movement or sound.
How do I make a DIY horror costume look professional without spending hundreds?
Start with a strong silhouette using inexpensive base materials like black fabric or household items shaped into unexpected forms. Invest in one show-stopping element, a quality mask like the Devil Injection Mask ($23.99) or Ghost Injection Mask ($23.99) from Dr. Hyde's Laboratory, that anchors the whole design. Build texture with craft supplies: paint, weathering techniques, or layered fabrics. Focus budget on the face and hands, which are most visible. Test wearability early so you're not rebuilding at the last minute. A focused design with one premium piece often outperforms an expensive full costume with weak details.
What horror costume materials work best for comfort and durability?
Choose breathable base fabrics like cotton or cotton blends that won't overheat during wear. Layer with stretchy materials for mobility. For masks and rigid elements, injection-molded plastic (like the officially licensed masks from Dr. Hyde's Laboratory) offers detail. Avoid materials that restrict vision or movement. Test all components before the event, wear your costume for at least 30 minutes to identify pinch points or heat buildup. Weathered or distressed effects can hide wear better than pristine finishes, making your costume more forgiving during extended wear.
How much time do I need to design and build a high-impact costume?
A beginner-friendly design using existing pieces (like pairing a quality mask with basic clothing and accessories) takes 2-4 hours. A moderately complex DIY costume with some fabrication, adding texture, weathering, or custom details, requires 8-16 hours spread over a few weeks. Advanced original designs with multiple components can take 20+ hours. Start with your narrative and silhouette first (30 minutes), gather materials (1-2 hours), build the base (4-8 hours), then add details and test (2-4 hours). Plan backwards from your event date; last-minute designs sacrifice impact.