

Bespoke Horror Prop Design for Events: A How-To Guide
Table of Contents
- Bespoke Horror Prop Design for Events: What You're Actually Commissioning
- Horror Prop Design Ideas: Matching Props to Your Event's Narrative
- Custom Horror Props: Writing the Design Brief and Step-by-Step Process
- Materials, Durability, and Reuse for Repeated Show Nights
- Horror Animatronics for Events: Sound-Activated and Interactive Props
- Budgets, Pricing Drivers, and Lead Times for Bespoke Horror Prop Design
- Event Prop Rental vs. Purchase: Which Fits Your Production?
- Safety, Accessibility, and Compliance for Guest-Facing Props
- Frequently Asked Questions
Last Updated: October 7, 2026
Bespoke Horror Prop Design for Events: What You're Actually Commissioning
Bespoke horror prop design for events is the process of commissioning a one-off prop, animatronic, or full scene piece built to your venue, your story, and your show schedule rather than pulled from a warehouse shelf. It starts with a design brief, moves through sculpting, fabrication, and finishing, and ends with installation and teardown. At Dr. Hyde's Laboratory, we build pieces that blur the line between design and narrative, because a prop that only looks scary is scenery, not a scene.
Most buyers assume the prop is the product. It isn't. You're buying a build process, a materials spec, and a delivery date that has to hold when your doors open.
Horror Prop Design Ideas: Matching Props to Your Event's Narrative
The strongest horror prop design ideas come from the story your event is already telling, not from a list of scary objects. A severed hand means nothing in a bright lobby. In a dim corridor with the right sound cue, it's the moment your guest stops walking.
Start by mapping your event into scenes. Each scene gets one emotional job: dread, shock, grief, or grim humor. Then match the prop to that job.
Haunted House Scenes and Room-by-Room Theming
Room-by-room theming is where most haunted attractions succeed or fail. A parlor scene wants slow-burn dread: a rocking chair that moves, a portrait with moving eyes, a doll that speaks when someone crosses the threshold. A basement scene wants noise and motion.
Group your props by intensity so guests get a rhythm instead of a wall of screaming:
- Low-intensity rooms: static figures, gothic design, graveyard dressing, spider projections
- Mid-intensity rooms: sound-activated props, hanging pieces, interactive props
- High-intensity rooms: animatronics, sudden movement, full-body prop reveals
Movie-Inspired Pieces, Masks, and Creature Props
Movie-inspired props and collectibles work best as anchor pieces, not filler. One recognizable silhouette in a room does more than ten generic skulls. Masks and costumes belong in the same planning conversation, because your actors and your props are competing for the same attention.
Creature props, character busts, and full-body figures should be placed where guests can study them from a safe distance. If a guest can't tell whether a figure is an actor or a prop, you've built the right kind of tension.
Custom Horror Props: Writing the Design Brief and Step-by-Step Process
Custom horror props are built from a written brief, and the brief is the single document that determines whether the build goes smoothly. Most practitioners find that a brief which fits on two pages and includes reference images outperforms a long narrative document, because fabricators work from visuals and dimensions, not adjectives.
A usable brief covers eight things:
- Concept and story beat: what the piece is and what it does emotionally
- Placement: room, sightlines, guest distance, ceiling height
- Dimensions and pose: standing, hanging, crouching, or mounted, with overall height, width, depth, and weight ceiling
- Materials and finish: what it should feel like up close, and whether it will be touched
- Interaction: static, motion-sensor, sound-activated, or voice-controlled, plus trigger distance and reset time
- Power: corded, battery, or low-voltage, and where the outlet or battery bay will live
- Logistics: deadline, shipping method, install window, storage between shows
- Approval contacts: who signs off on sculpt, finish, and final, and how fast they can respond
From Concept Sketch to Installation and Teardown
- Concept sketch and reference board. The fabricator returns 2-3 thumbnail directions with rough dimensions and a materials note. This is the cheapest place to redirect.
- Scale maquette or digital model. A small physical or 3D model confirms proportion and pose before full-size work begins.
- Full-size sculpt. Clay or foam sculpting establishes the silhouette and surface detail. Approve the sculpt in person or via video walkaround before it is sealed.
- Mold making. A silicone or fiberglass jacket is pulled from the sculpt. Once the mold exists, the shape is locked.
- Casting and armature. Resin, fiberglass, or foam casting around a steel or aluminum armature gives the piece its structure and mounting points.
- Paint and finish. Base coats, washes, aging, and any translucency or wet-look effects. This is where a piece stops looking like a prop and starts looking like a body.
- Mechanism integration and test. Animatronic units, sensors, speakers, and wiring are installed and cycled for hours before crating.
Materials, Durability, and Reuse for Repeated Show Nights
Durability is the difference between a prop you run for one weekend and one you run for three seasons. Polyester and plastic construction holds up well for hanging and crouching pieces.
- How many show nights will this run? One weekend and thirty weekends demand different builds.
- Will guests touch it? Touch points need reinforced surfaces and repaintable finishes.
- How does it store? Humidity, heat, and stacking ruin finishes faster than crowds do.
Horror Animatronics for Events: Sound-Activated and Interactive Props
Horror animatronics for events turn a static scene into a timed performance. Sound-activated and voice-controlled units trigger on guest movement, light, or noise, which means the scare lands when the guest is actually there rather than on a fixed loop.
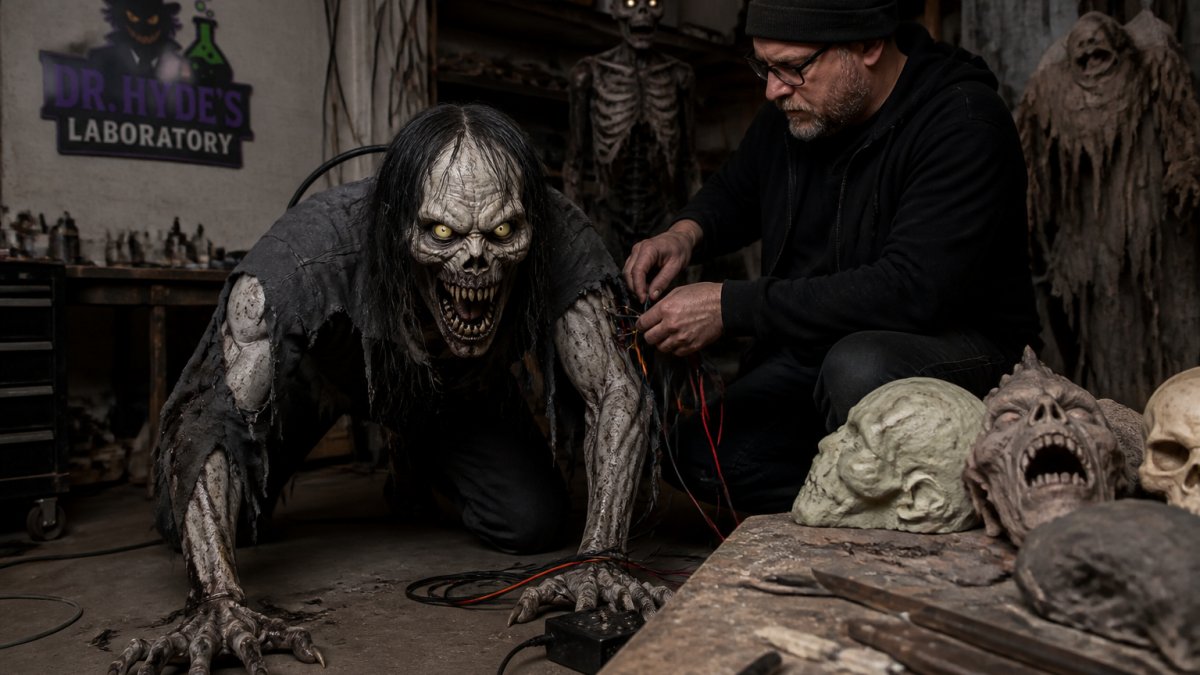
Placement decides whether an animatronic reads as terrifying or broken. Put the trigger where guests pass slowly, not where they sprint. Battery access matters too: if you can't swap batteries without dismantling the scene, you'll skip it on a busy night.
For smaller rooms, motion and light sensor props give you most of the animatronic effect at a fraction of the footprint. Our Animated Cracked Victorian Doll stands 32 inches tall, glows blue from hollowed eyes, and speaks one of five phrases with each activation of her motion/light sensor. For a bigger scare, the 2 Ft Animated Crouching Monster works as a floor-level reveal, while the 3 Ft Upside Down Animated Girl and 3 Ft Hanging Animated Bat fill overhead space that guests rarely check.
Animated Cracked Victorian Doll →

Budgets, Pricing Drivers, and Lead Times for Bespoke Horror Prop Design
Bespoke horror prop design for events is priced by complexity, not by size alone.
| Cost Driver | What Raises the Price | What Keeps It Down |
|---|---|---|
| Interaction | ||
| Logistics |
Lead times follow the same logic.
Event Prop Rental vs. Purchase: Which Fits Your Production?
Event prop rental vs. purchase comes down to how many times you'll use the piece and how specific your vision is. Rental suits one-off events with a generic theme. Purchase suits anyone running repeated show nights or building a signature scene.
Rental wins when your event is a single night, your theme is broad, and you have no storage. Purchase wins when you run a season, need a specific character or creature, or want a piece that becomes part of your venue's identity.
The math usually tips toward buying around the second or third use. After that, a rental fee is money you'll never see again, while a purchased prop keeps working. For operators building a permanent attraction, custom pieces also double as marketing: guests photograph the figure they can't find anywhere else.
Safety, Accessibility, and Compliance for Guest-Facing Props
Safety is not a finishing step, it is a design input. Guest-facing props need stable bases, no exposed sharp edges, secured cabling, and battery compartments that guests and staff can reach safely. The practical way to get there is to treat the prop as a piece of temporary scenery and plan against the same rules your venue already applies to set pieces and decorations.
Fire, Electrical, and Mechanical Basics
- Flame resistance. Display fabrics, foliage, and drapery used on or around props are commonly required to be flame-resistant or treated, and inspectors may ask for documentation.
- Electrical. Any corded or low-voltage component should be listed by a recognized testing laboratory (for example, UL) and plugged into a GFCI-protected circuit. Keep cords out of guest reach, use strain relief at every connection, and never daisy-chain power strips.
- Mechanical.
- Egress. Props cannot narrow an exit path or block a door swing. Confirm the required clear width for your occupancy and keep it clear even during the show.
- Stability. Floor-standing figures should be base-weighted or anchored, and overhead pieces should hang from rated hardware with a secondary safety line.
Accessibility and Sensory Planning
Build accessibility into the plan from the start. Guests with mobility aids, service animals, or sensory sensitivities still move through your space, and a prop that blocks a path or triggers without warning creates a real problem.
- Keep at least one accessible route through every scene, and keep trigger zones clear of walkways.
- Give staff a single, labeled way to disable any animatronic instantly, ideally a kill switch at the room entrance.
- Post sensory warnings at the entrance for strobe, sudden motion, loud audio, and fog, and offer a bypass path.
- Set audio levels so a guest can still hear staff instructions over the scene.
- Avoid fog and haze near accessible routes where it can obscure the floor or reduce visibility for guests with low vision.
Getting Approval Before You Install
Check your local fire code for display and egress requirements before installation, and confirm any electrical components meet the standards your venue's inspector expects. If you are unsure, ask the authority having jurisdiction rather than guessing. For a temporary event, that often means the local fire marshal's office; for a permanent attraction, it may also involve your building department and insurer.
Frequently Asked Questions
How do you commission custom horror props for an event?
Start with a written design brief that names your event dates, venue dimensions, and theme. Include reference images and the story each room should tell.
How much do bespoke horror props for events cost?
Ready-made animated pieces give you a benchmark for what a finished, moving prop costs. For example, an animated cracked Victorian doll runs $79.99, a 2 ft animated crouching monster is $137.99, and a 3 ft upside down animated girl is $45.99.
Should you rent or buy horror props for a one-time event?
Rent when the event runs once, the venue is far from your storage, and you have no plan to reuse the piece. Buy when you run multiple nights, repeat the event annually, or want props that match a permanent theme.
How do you make horror props safe for guests and staff?
Keep all electrical connections off the floor and away from guest paths, secure every hanging piece with a secondary tether. Provide clear walkway widths. Use battery power where cords would cross a guest route, and check that each prop's weight is supported by a rated anchor rather than set dressing.
Every event has a moment where the room either works or it doesn't, and that moment is usually a prop doing exactly what it was built to do. Dr. Hyde's Laboratory builds props for operators who want that moment to be deliberate: experimental animatronics, wearable constructs, and provocative decor designed to shift how guests move through a space. Browse the collection, or tell us what your scene needs and we'll help you build it.